
belt conveyor tracking keeps a belt within its intended travel path by maintaining suitable loading, support geometry and operating conditions. If you keep adjusting one frame while drift returns, start with a fault map. Follow the belt circuit, check likely causes after isolation and verify one repair at a time.
1. Where should belt conveyor tracking diagnosis begin?
Begin by locating where drift starts and documenting when it occurs. Your belt conveyor tracking record should distinguish the source of movement from where rubbing becomes visible. If you begin only at a damaged edge, you may inspect downstream symptoms instead of an upstream cause.

What should you observe during operation?
Map the belt path before changing any setting. Use designated observation positions with guards in place. Compare relevant empty and loaded conditions. Then record lateral movement at repeatable locations along carrying and return runs.
- Mark where drift starts, grows or changes direction.
- Record loading condition and any operating change.
- Note whether a disturbance follows a splice or belt mark.
A sketch often makes observations clearer than a description alone. Include pulleys, loading points and suspect supports. Because repairs change behavior, preserve this baseline before physical work begins.
Which observation narrows your search?
| Observation | Candidate relationship | Next step |
|---|---|---|
| Appears only under load | Feed or loaded support | Inspect loading zone |
| Starts near one location | Local geometry or rotation | Check that support area |
| Repeats with belt position | Belt or splice condition | Identify affected belt section |
Key Takeaway: Build a drift map first. Use location, loading and recurrence to choose the next inspection.
2. How can loading cause a belt to wander?
Uneven feeding can change belt loading and support contact, contributing to drift. Your belt conveyor tracking should therefore include your chute and loading-zone arrangement. If empty running differs from loaded running, inspect how material reaches the belt before adjusting distant supports.

What should your loading check cover?
Watch the material path into your trough. Feed direction and lateral distribution can change during production. A blocked chute or changing material flow may shift contact. Check loading support and containment with the same attention given to belt position.
- Record where material lands across usable belt width.
- Inspect chute condition and recurring blockages after isolation.
- Check impact support against approved loading geometry.
If load distribution changes with feed rate, include those conditions in your trial record. Avoid calling a trainer successful after testing only one loading condition. Correct the known feed problem and then compare belt behavior with your baseline.
Which loading symptom suggests which check?
| Symptom | Possible source | Inspection |
|---|---|---|
| Load gathers on one side | Off-center feed | Chute position |
| Drift changes with flow | Variable distribution | Relevant feed conditions |
| Local belt deflection | Uneven support | Loading-zone arrangement |
Key Takeaway: Correct documented feed and support faults before adjusting tracking hardware. Compare results under the loading conditions that caused drift.
3. Why must you inspect the return path too?
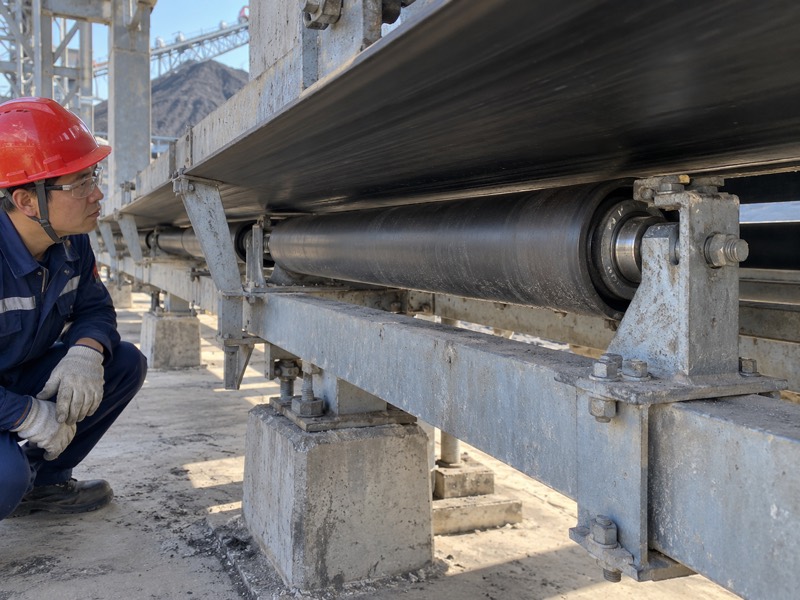
A return path influences how the belt approaches pulleys and later carrying support. Your belt conveyor tracking review must cover the complete circuit. If return rollers are dirty, skewed or seized, a carrying-side adjustment may leave the disturbance unchanged.
Where should your return inspection focus?
Follow the return belt through each contact point. Inspect return roller support and nearby structure after isolation. Deposits can change contact across width. A belt may also rub structure before reaching the location where operators notice drift.
- Map return-side contact and visible rubbing.
- Check roller surfaces, rotation and mounting condition.
- Record cleaner locations and material collection below the belt.
Then compare return observations with carrying-side behavior. A fault on one run can affect approach elsewhere around the circuit. Keep findings linked by location rather than treating each visible rub as a separate isolated problem.
Which return finding deserves action?
| Finding | Possible effect | Repair focus |
|---|---|---|
| Uneven roller deposits | Changes contact geometry | Carryback and cleaning |
| Seized support | Adds sliding contact | Bearings or component |
| Skewed return frame | Alters belt approach | Frame alignment |
Key Takeaway: Inspect both carrying and return runs. Use a circuit map so upstream contact and downstream symptoms remain connected.
4. How does buildup change belt contact?
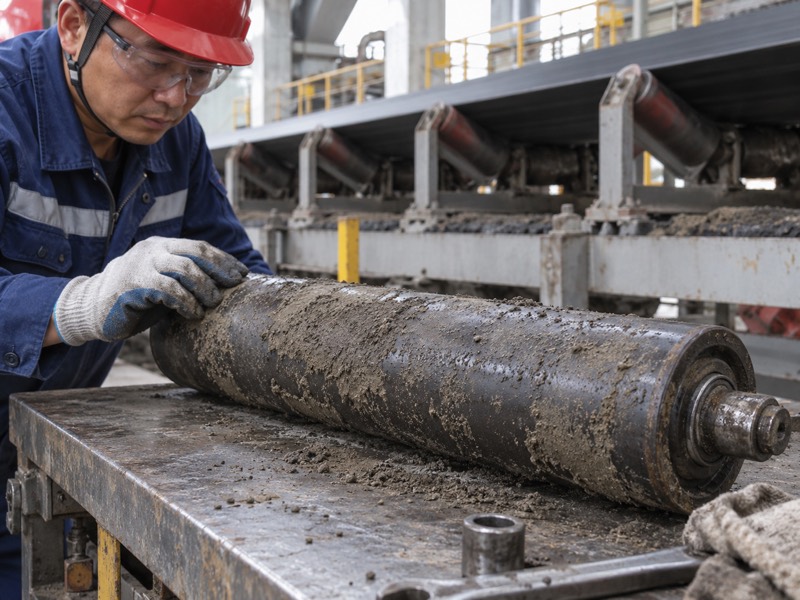
Buildup changes the effective shape or friction of a contacting surface. Your belt conveyor tracking can deteriorate when deposits form unevenly across rollers or pulleys. If cleaning provides only a brief improvement, document where deposits return and inspect their source.
What should you inspect before cleaning?
Preserve the deposit pattern in your records. Photograph its location and note material condition. Wet or sticky carryback may recur differently from dry dust. Then use approved cleaning methods and inspect the underlying surface.
- Record whether deposits cover one side or the full face.
- Check cleaners and collection arrangements.
- Note corrosion, surface damage or seized rotation beneath buildup.
Follow site-approved lockout/tagout before hands-on cleaning or inspection. Don’t scrape a running roller or pulley. If recurring carryback remains unresolved, review the cleaning system rather than accepting repeated tracking adjustment.
What does recurrence tell you?
| Deposit behavior | Possible relationship | Next review |
|---|---|---|
| Returns at same location | Persistent carryback source | Cleaner and material path |
| Appears unevenly | Unequal contact geometry | Deposits across width |
| Hides surface damage | More than a cleaning fault | Underlying component condition |
Key Takeaway: Record deposits before removing them. Verify both cleaning results and their recurrence under representative operating conditions.
5. How do you check whether rollers turn freely?
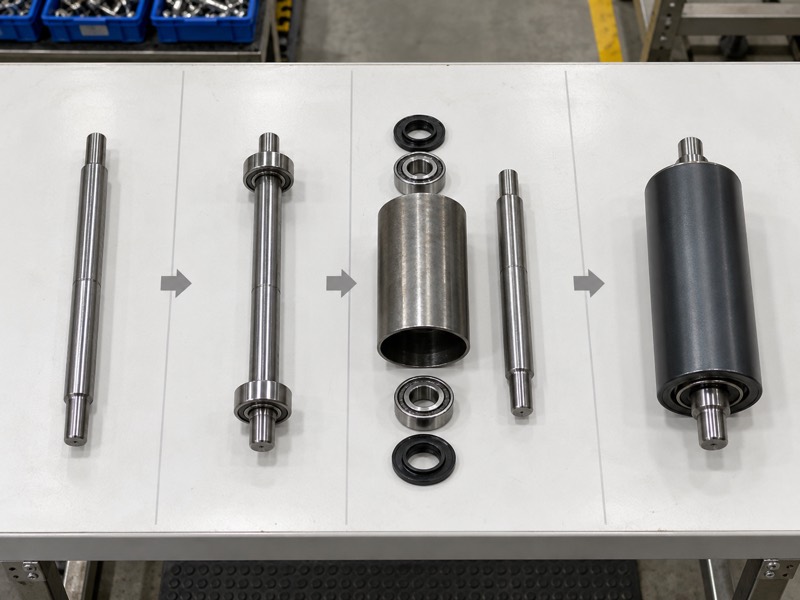
Check rotation through your approved isolated inspection procedure and compare findings with installed wear evidence. Your belt conveyor tracking diagnosis should identify seized or rough support. A damaged roller can change contact even when its frame remains correctly aligned.
What evidence supports replacement?
Combine rotation feel with physical condition. Inspect bearing looseness, seal damage and deposits. Look for sliding marks on roller surfaces or belt cover. Then check mounting security before deciding which part failed.
- Record rough or restricted rotation.
- Inspect shaft retention and bearing interfaces.
- Compare surface marks with belt-contact position.
Unloaded spin duration alone cannot establish service suitability. Bearings, seals and actual loading affect operation. Use an agreed inspection method rather than a casual comparison between clean and contaminated parts.
Which finding points toward which repair?
| Finding | Candidate issue | Further check |
|---|---|---|
| Restricted rotation | Bearing or seal damage | Contamination and mounting |
| Loose shaft interface | Installation or wear fault | Retention details |
| Sliding marks | Failed rolling contact | Roller and belt condition |
Key Takeaway: Replace or repair rotating faults from documented evidence. Verify rotation and mounting before reassessing the belt path.
6. How should you verify frame alignment?
Verify frames against a common approved conveyor reference and inspect their condition before adjustment. Your belt conveyor tracking needs consistent support geometry across the relevant span. If you measure against a bent neighboring bracket, your adjustment can preserve the original error.

What should your alignment record contain?
Establish a reliable datum before moving hardware. Include frame axis, support elevation and intended profile where relevant. Check loose or damaged mounts. Then record dimensions before and after each approved change.
- Inspect frame security and structural condition.
- Compare support positions with approved layout.
- Confirm adjacent geometry through a suitable measurement method.
Don’t skew multiple frames at once to chase visible drift. That can make later diagnosis harder. Correct a documented fault, restore guards and observe its effect before changing another area.
Which alignment detail affects contact?
| Detail | Possible effect | Record |
|---|---|---|
| Frame axis | Changes local belt approach | Datum-based measurement |
| Support elevation | Changes engagement | Installed height |
| Trough profile | Changes load support | Approved arrangement |
Key Takeaway: Adjust from measured faults and a common datum. Keep each change traceable so trial results remain useful.
7. What should you check at pulleys and take-up points?
Check pulley alignment, surface condition and take-up movement against the conveyor’s approved design. Your belt conveyor tracking review should include these contact points and adjustment mechanisms. If a take-up moves unevenly, support corrections elsewhere may fail to resolve drift.

Which checks require engineering references?
Use equipment drawings for pulley and tension adjustments. Pulley alignment and take-up settings interact with belt operation. Inspect guides, bearing supports and deposits after isolation. If required settings are missing, request clarification before altering tension.
- Record take-up position and any uneven movement.
- Inspect pulley surfaces and bearing-support condition.
- Confirm adjustments through approved site procedures.
Don’t assume increased tension will cure drift. It changes belt and component loading and may create another problem. Your equipment design should govern permitted tension and adjustment methods.
Which finding suggests which review?
| Finding | Possible concern | Review |
|---|---|---|
| Uneven take-up movement | Changing pulley position | Guides and adjustment |
| Pulley deposits | Altered contact | Cleaning and surface |
| Loose bearing support | Unstable geometry | Structural mounting |
Key Takeaway: Include pulleys and take-up mechanisms in your fault map. Make adjustments only against approved design references.
8. How can belt or splice condition cause repeating drift?
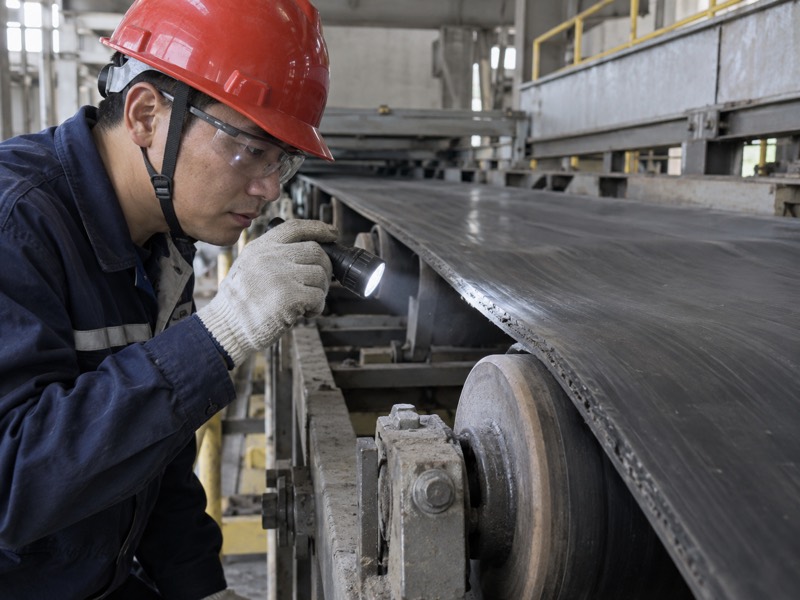
A local belt defect or unsuitable splice geometry can produce movement tied to a recognizable belt position. Your belt conveyor tracking observations should record that recurrence. If a disturbance repeats each circuit, inspect the identified area rather than continually shifting support.
What should you record at the affected area?
Match the event with a specific belt location. Use safe observations and approved marking practices. Then inspect after isolation for damage, shape changes or splice condition. Keep repair responsibility with qualified personnel and applicable belt procedures.
- Record recurrence at splice passage or another visible reference.
- Inspect belt edges, cover and splice geometry.
- Compare empty and loaded behavior where relevant.
A straight-looking edge cannot establish acceptable belt condition by itself. Construction and previous damage can affect behavior. Obtain a belt specialist’s review when inspection leaves the cause unclear.
Which repeating evidence helps diagnosis?
| Evidence | Candidate relationship | Inspection target |
|---|---|---|
| Event follows splice | Splice geometry or condition | Identified joint |
| Event follows damaged section | Local belt change | Affected belt area |
| Recurrence lacks clear location | Observation incomplete | Better circuit record |
Key Takeaway: Tie repeating drift to a belt location. Use qualified inspection before deciding whether component adjustment can address it.
9. When should you consider tracking hardware?
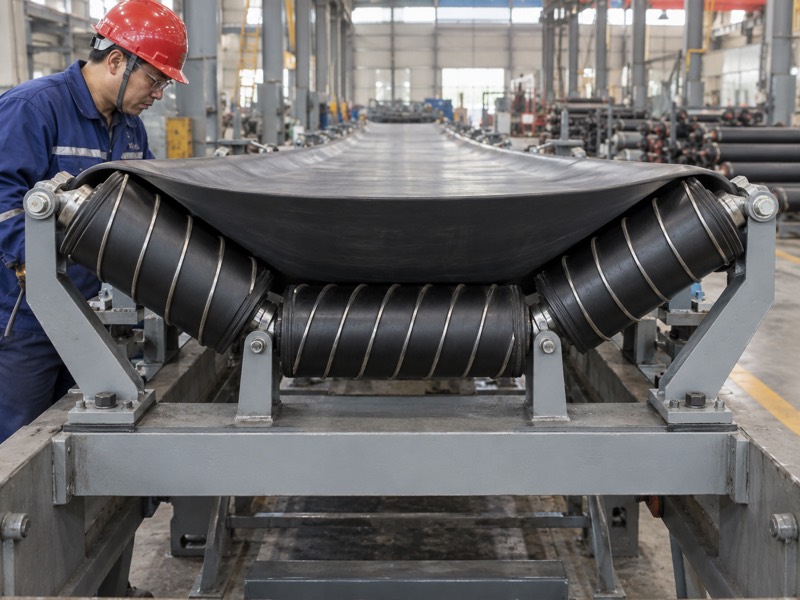
Consider suitable tracking hardware after correcting known faults and confirming its role within your layout. Your belt conveyor tracking plan should define what residual movement the assembly must address. A tracker cannot provide a universal repair for damaged belts or misaligned structures.
How do you assess a proposed mechanism?
Ask how correction develops in your application. Review contact, pivot movement, sensing parts and operating direction. Then confirm placement and structural mounting. Keep component requirements separate from any broad claim about automatic centering.
- Obtain a drawing and mechanism description.
- Confirm carrying or return duty and reversing suitability.
- Define installation settings and acceptable contact.
If a proposal changes nearby geometry, review that change before purchase. A complete application package helps you compare mechanisms against the same conditions. Keep limitations and unresolved questions visible.
Which proposal detail requires evidence?
| Detail | Question | Evidence |
|---|---|---|
| Corrective mechanism | What movement guides the belt? | Assembly explanation |
| Placement | Does contact suit this location? | Approved layout |
| Duty | Will operating directions be supported? | Written suitability |
Key Takeaway: Select tracking hardware for a defined residual need. Approve its mechanism and limits against your conveyor conditions.
10. How do you verify that a repair solved the problem?
Verify the repair by comparing belt behavior with your recorded baseline under relevant conditions. Your belt conveyor tracking acceptance should include path, contact and recurrence. If a brief trial omits the loading condition that caused drift, its result remains incomplete.

What should your final trial record show?
Test the repaired condition before closing your work order. Restore guards and follow your commissioning procedure. Observe from safe positions. Then record whether the original drift pattern returns during representative operation.
- Identify the repaired fault and changed component or setting.
- Compare empty and relevant loaded operation.
- Record contact, belt path and any recurring disturbance.
If drift remains, return to your fault map with new evidence. Avoid changing several settings without records. Preserve final drawings and inspection results so future work begins from a known configuration.
Which trial result supports which decision?
| Result | Interpretation | Action |
|---|---|---|
| Original event disappears | Repair affected documented cause | Confirm relevant duty |
| Drift changes location | Another influence remains | Update fault map |
| Contact remains unacceptable | Repair incomplete | Continue cause review |
Key Takeaway: Accept repair through relevant operating evidence. Keep baseline, changes and final observations in one maintenance record.
FAQ
Q1: Can I fix drift by skewing any roller frame? Only through approved adjustment. Begin with a fault map and measured geometry.
Q2: How do I know whether loading causes drift? Compare empty and loaded operation. Record where material lands and where movement starts.
Q3: Can cleaning solve mistracking? Sometimes deposits contribute. Check recurrence and underlying roller or pulley condition after cleaning.
Q4: Should I increase tension when a belt wanders? Use design-approved settings. Tension changes component loading and cannot replace diagnosis.
Q5: What’s the best record for a supplier review? Send your circuit map, duty details, photographs and repair observations.
Send your belt layout and drift record when you contact us about suitable tracking components and support requirements.